
how to use blown in insulation/ how to use blown insulation machine
How to use blown in insulation and blown insulation machines, this post is best for you, if you are considering insulating your home by using the blown in insulation types and methods. Putting or applying blown-in insulation to a house is a popular and cost-effective method to improve its ability to conserve energy.
Blown-in insulation can be an excellent choice if you want to lower your home’s environmental impact, save money on heating and cooling, or improve comfort in your home. So, here we will discuss what blown-in insulation is, its advantages, the available types, and how to install it or use blown-in insulation. As well as we will share some advice and tips for maximizing home efficacy in this comprehensive post. Blown-in Insulation: A Wise Option for Energy Efficiency: A Comprehensive Guide
Loose-fill insulation, sometimes referred to as blown-in insulation, is an affordable and effective method of insulating residential and commercial buildings. This kind of insulation works especially effectively in places that are hard to access for conventional insulation materials. Here, we are going to delve into the information about using these insulation types. How to use blown-in insulation in this tutorial, covering its types, advantages, and installation procedure, as well as information bout, how to use a blown-in insulation machine. In our previous post, we shared information about how to install Fanfold insulation, this is also a straightforward installation process Till the end of this post, we will advise on making the most of this energy-efficient option.
What is Blown-in insulation:
Using specialized equipment, loose, fibrous insulation is blown or sprayed into walls, attics, and other places. Its purpose is to reduce heat movement between a building’s exterior and inside by filling up gaps and forming a thermal barrier. Most often, materials like fiberglass, cellulose, or mineral wool are used to make this kind of insulation.
Benefits of Blown In Insulation
Increase Energy Efficiency
Blown-in insulation’s energy-efficient advantages include: By efficiently reducing heat transmission, blown-in insulation keeps your house warmer in the winter and colder in the summer. Significant energy savings and a cosier home are possible outcomes of this.
Cost-Effective- benefits of blown in insulation
Blown-in insulation is frequently less expensive when compared to conventional insulation techniques. Reduced labour expenses can also be a result of its simplicity of installation.
Versatility- benefits of blown in insulation
Blown-in insulation is suitable for use in walls, attics, and difficult-to-reach places. Blown in insulation is used mostly, because of its versatility available in a wide variety, it can be used in both new construction and retrofitting.
Environmentally Friendly
Blown-in insulation is a great option for people who want to lessen their influence on the environment because it is composed of a lot of recycled or sustainable materials.
How To Use Blown In Insulation

A common and efficient way to insulate homes and improve comfort and energy efficiency is with blown-in insulation. This kind of insulation is usually sprayed or blown into attics, wall cavities, and other areas. Blown in insulation made by materials like mineral wool, cellulose, as well as fiberglass. We will go with these important procedures and factors and elements to take into account for a successful installation as we examine how to use blown-in insulation in this blog post.
Understand Your Needs for Insulation
Identifying your home’s specific insulation requirements is essential before you start applying blown-in insulation. Take into account elements like the local temperature, the insulation that is presently in place, and the places that want maintenance.
Arrange the Necessary Equipment and Materials
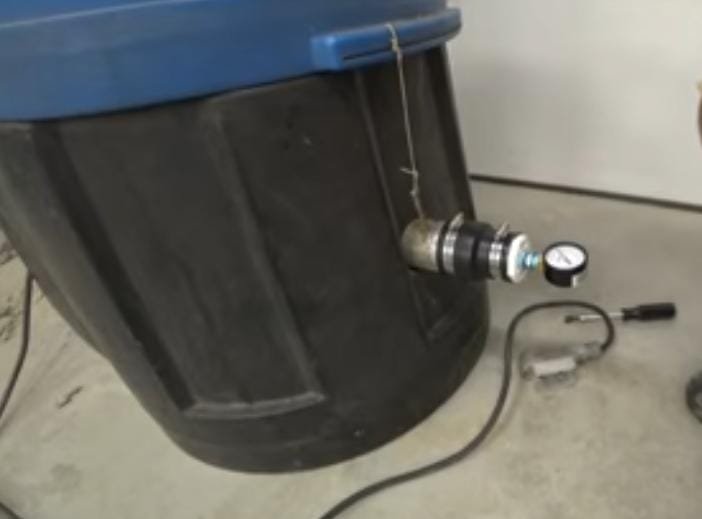
Make sure you have all the equipment and materials needed for the project. A blowing machine, pipes, safety equipment (gloves, goggles, mask), and the insulation material itself are examples of common tools.
Selecting the Correct Insulation Material
There are several varieties of blown-in insulation materials available, and each has benefits and drawbacks of its own. Mineral wool, cellulose, and fiberglass are common options. You can select this insulation material by considering, keeping things like price, fire resistance, and R-value in mind.
Inspect and Set Up the Space-
Inspect and examine the area before installing blown-in insulation. Make sure no problems, including mold or leaks, are there. It is very necessary, to take care of any issues before installing the insulation.
Calculate and Measure
Determine the area that requires insulation with accuracy. Based on the recommended R-value for your area and the kind of material you’re using, find out how much insulation is needed.
Safety Comes First
Put on the required safety gear before beginning the installation. To protect yourself from any possible hazards in the insulation material, this may include goggles, a mask, and gloves.
Set the Blowing Machine
Make sure your blowing machine is set up according to the manufacturer’s instructions if you’re using one. Before you start the insulation procedure, make sure it works properly.
Install attic insulation in place
Putting the insulation material properly and evenly is the first step in insulating an attic. Make sure to cover the entire attic area with the blowing machine, taking care to get into the corners and edges.
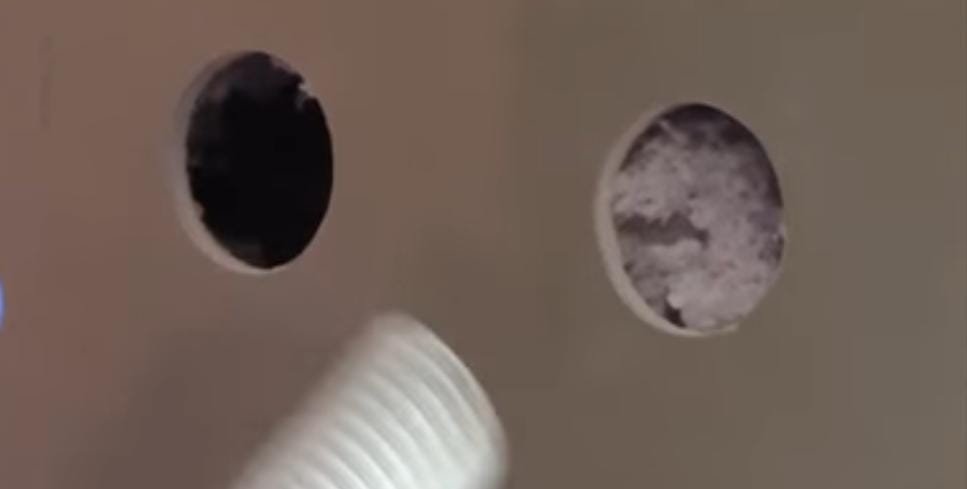
Put in Wall Insulation
Drill tiny holes into the wall cavities for walls. Fill the spaces with insulation by using the blowing machine. Make sure you cover the entire area evenly as you work your way around it.
Ensure Sufficient Ventilation
It needs proper ventilation to stop problems like mold humidity and moisture. Make sure insulation isn’t blocking roof vents or other ventilation systems.
Cleaning Up- how to use blown in insulation
Insulation Experts say after all those steps, the insulation is installed, so make sure to remove and clean up any extra insulation material on the surface area and seal any holes that were created. Get rid of waste products in a moral way.
Evaluate and Monitor Insulation Installation
Assess the insulation’s efficacy after installation. Keep attention on your home’s overall comfort and energy costs. According to observation, pay attention to accurate insulation, If required, think about adding more insulation in particular places.
Installation Processes– how to use blown insulation machine
It is important to completely prepare the area before beginning the insulating process. This entails keeping the area dry and clean as well as caulking any gaps, cracks, or openings to stop air leaks. In addition, to defend against potential health risks, protective gear including masks and goggles should be worn.
1. Preparation for the Installation Process:
a. Inspection and preparation:
Examine the space to find any problems, such as mold, leaks, or vermin.
b. Sealing Gaps: To guarantee that the insulation is effective, seal any holes, cracks, or gaps.
2. Setup of Equipment and machine:
a. Blowing Machine: Assemble and fill the blowing machine with the selected insulating material.
b. Wear the proper protective equipment, such as masks and goggles.
3. Application:
a. Even Coverage: Make sure that every area is sufficiently covered by using the blowing machine to disperse the insulation in an even manner.
b. Thickness: According to the manufacturer’s guidelines for the ideal insulation thickness.
4. Following Installation:
Cleaning: Make sure the workspace is left in good shape and remove any extra insulation material.
Check for quality: Make sure the installed insulation satisfies the requirements by looking it over.
You can choose if to include blown-in insulation in your home improvement plans by being aware of the different types of blown-in insulation, how it is installed, and what practical advice to follow. Explore the options of blown-in insulation to take the first step towards a more sustainable and energy-efficient home.
How To Use Blown Insulation Machine
It requires careful planning as well as observance of safety precautions to operate and use or install a blown insulation machine. The methods listed below offer a broad overview, but it’s crucial to refer to the detailed instructions supplied by the insulation machine’s manufacturer:
1.. Read the manual of machine
Learn how to follow the safety precautions and manufacturer’s instructions found in the handbook. Every machine could have different needs and using steps we must follow these.
2. Set Up the Space for use and blowing insulation:
To guarantee a secure and unhindered working environment, clear the space where you’ll be working.
3. Take on safety gear
Put on the proper protective clothing, such as long sleeves, gloves, a dust mask, and goggles. The skin and eyes may become irritated by blown insulation.
4. Configure and set up the Device:
The insulation machine should be placed in a convenient area. Make sure it has easy access to the insulation material and is situated on a firm platform.
5. Load the Material for Insulation: How to use blown insulation machine

Load the insulating material into the machine’s hopper after opening the package. For the correct loading technique, refer to the machine’s instructions.
6. Adjust the circumstances:
Depending on the kind and amount of insulation you’re using, adjust the machine to the recommended settings. To find out these settings, go to the manufacturer’s instructions.
7. Switch on the machine:
Turn on, switch on, and start the machine and give it a few minutes to ensure everything works properly. Look for any strange or heavy noises or problems, and focus on the machine’s sound.
8. Position the Pipe in Place:
Place the tube or pipe in the spot you want for the insulation to be blown out. Make sure that the connection has been secured securely and won’t come loose while in use.
9. Start the Insulation Blowing
Blow the insulating material into the proper space once everything is set up and the machine operates smoothly. To distribute the insulation equally, move the hose in an even motion.
10. Monitor or watch on the process:
Observe the machine’s working and make any changes that are required. We recommend you, please Be alert for any signs of blockages or problems.
11. Fill the Chopper Again:
Stop the machine and restore the container according to the manufacturer’s instructions if the insulation material inside runs low.
12. Safely Shut Down:
After finishing the insulating process, turn off the equipment by following the instructions provided in the manual.
13. Clear Up:
After removing any extra insulation, place the machine back in its assigned storage space.
Safety should always come first, and you should adhere to the manufacturer’s detailed instructions when using an insulating machine. Get help from the manufacturer if you run into any problems or have any inquiries.
It is important to completely prepare the area before beginning the insulating process. This entails keeping the area dry and clean as well as caulking any gaps, cracks, or openings to stop air leaks. In addition, to defend against potential health risks, protective gear including masks and goggles should be worn.
Bottom Line Of, How To Use Blown In Insulation/ How To Use Blown Insulation Machine
A practical and efficient way to enhance and improve the energy efficiency of residential and commercial structures is to use blown-in insulation is known as the best option and correct choice. A blown-in insulation machine needs to be operated with great care, attention to detail, and observance of safety procedures. Be it a professional contractor or a do-it-yourself enthusiast, understanding how to install blown-in insulation may make a significant impact in creating a cozy and energy-efficient living or working space.
You can maximize the benefits of blown-in insulation to build an energy-efficient and well-insulated home by following these steps. Your insulation will continue to function at its best over time with routine maintenance and sporadic checks.
Do let us know how you feel about this information by commenting.
Like our Facebook page and follow for other updates like this.