Overview of Rockwool Sound Absorption and installing rockwool safe and sound-
Mineral wool insulation, sometimes referred to as rockwool sound insulation, is a multipurpose substance that lowers noise transmission inside structures. This insulation material is known as an environmentally beneficial choice for soundproofing walls, ceilings, as well as floors because it is composed of natural stone and reclaimed slag. Rockwool insulation is widely used cause it can be installed to absorb sound waves and reduce reverberation, which can greatly enhance acoustic comfort and provide us with soundproofing quality.
One sort of material used to lessen noise in buildings is Rockwool sound insulation, sometimes referred to as mineral wool insulation. It is created by melting and spinning natural materials like diabase or basalt into fibers. After that, these fibers are crushed to create thick sheets or batts that can be put on ceilings, walls, and floors.
Here’s what you should know about Rockwool sound insulation: In the following passage you can understand what is Rockwool sound insulation as well as how it works, let’s start with this important topic,
What Is Rockwool Sound Insulation and How It Works

Reduces Noise: Rockwool sound insulation installation
By absorbing and blocking sound waves, Rockwool insulation helps to minimize the amount of noise that enters and exits a space. Your house may become calmer and quieter as a result.
Composed of Rocks
The raw materials are naturally occurring rocks that are heated until they melt.
Simple to Install: Rockwool Sound Insulation Installation
Rockwool insulation is readily fitted between wall studs, floor joists, and ceiling beams in the form of sheets or batts. It is adaptable and may be trimmed to fit a variety of spaces. You may read the post, on how to soundproof the ceiling.
Additionally, it is fire-resistant, which helps prevent fires from spreading quickly and increases the safety of your house.
Does Not Rot or Decay
Unlike certain other insulation kinds, rock wool is resistant to rot and decay, allowing it to survive for a very long time before needing to be replaced.
Beneficial to the Environment
Rockwool is an eco-friendly insulation option because it is composed of natural materials and is recyclable.
All things considered, Rockwool sound insulation is a fantastic option to increase the quietness, comfort, and fire safety of your house.
Rockwool Sound Insulation Installation
You can follow the following information about installing rockwool safe and sound insulation-
Evaluating the Region
It’s critical to evaluate the area in need of sound insulation before starting the installation process. Determine the types and thickness of insulation needed to achieve the appropriate level of soundproofing by identifying the sources of the noise. Common locations for sound absorption include floors, ceilings, and the walls separating rooms.
Safety Measures- Rockwool Sound Insulation Installation
Make sure you have the required safety gear before handling rockwool insulation. This can involve wearing long sleeves, a dust mask, gloves, and goggles to prevent skin irritation. It is important to take the necessary precautions since rockwool insulation can produce small particles and fibers that can irritate skin and respiratory systems.
Getting Ready
Set up the space where the insulation will be installed. Make sure all surfaces are dry and clean, and remove any impediments. To prepare a clean surface for installation, remove any old insulation or covers from walls or ceilings where you plan to install insulation.
Calculating and Cut Material

Measure the space that needs to have insulation done, making sure to account for any vents, pipes, and electrical outlets. Use an insulation saw or utility knife to cut the rock wool insulation panels to the right size. When cutting the insulation, wear gloves and a dust mask to prevent irritation to your skin and fibre inhalation.
Wall Installation
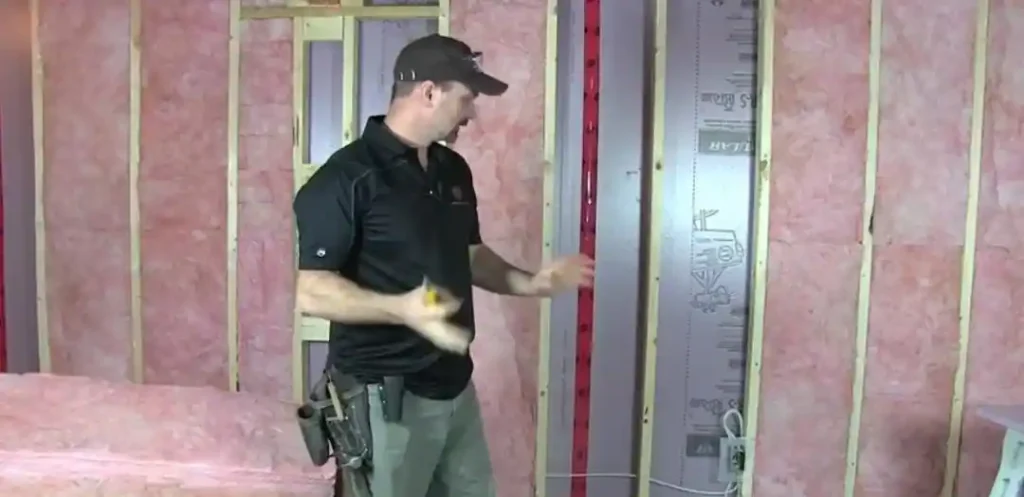
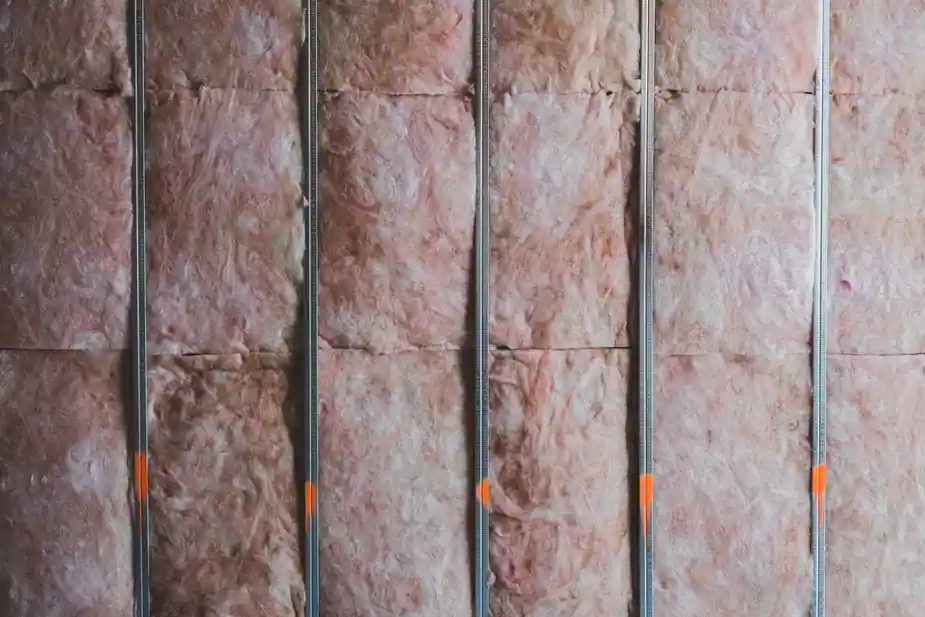
The first step in installing insulation in walls is to sandwich the panels between the joists or studs.
To ensure a secure fit, press the insulation firmly into place. If required, trim any extra insulation with a utility knife. To maximize the efficiency of soundproofing, repeat this technique for each wall cavity, being careful to fill in all cracks and voids.
Ceiling Installation
The first step in installing ceiling insulation is to sandwich the panels between the ceiling joists. To stop the insulation from sagging, hold it in place and fasten it using wire hangers or insulation supports. To provide adequate ventilation, make sure there is a tiny space between the insulation and the roof deck. To finish the installation, cover the insulation with plasterboard or another type of ceiling material.
Floor Installation- Rockwool Safe and Sound Installtion
Make sure the panels fit snugly between the floor joists when installing insulation on floors. Use insulation supports or wire hangers to firmly anchor the insulation. To further minimize noise transmission, think about adding a layer of carpet or acoustic underlay while putting insulation in a suspended floor.
Concluding and completing
To stop sound from leaking through the insulation, use acoustic sealant to seal any seams or holes after installation. Be especially aware of the spaces surrounding electrical outlets, doors, and windows as these can frequently be locations where sound enters a building. Cover the insulation with plasterboard, plasterboard or another appropriate material to complete the installation.
Examining- rockwool sound insulation installation
Test the insulation’s efficiency using a sound test once installation is complete. To find the amount of sound reduction accomplished, play a loud sound source in one room and measure the sound levels in the surrounding rooms. If more installations or modifications are required to get the required level of soundproofing, make them.
Maintenance
For rockwool insulation to remain effective over time, regular maintenance is necessary. Check the insulation regularly for indications of degradation or damage, such as moisture accumulation or compression. As soon as possible, replace any broken insulation to preserve the best possible soundproofing.
Installing rockwool sound insulation is known as a very effective way to reduce noise transmission within buildings and improve acoustic comfort. By following these steps and taking the required safety precautions, you may drastically reduce noise and create a more peaceful and comfortable atmosphere indoors.
So, here in this post, we will put it simply, this article and post surly provide a comprehensive description of how to install rockwool sound insulation and outline the necessary safety precautions to ensure a successful installation.
Rockwool Safe And Sound Installation
Putting in sound insulation is a crucial first step in making your house or place of business feel cozy and tranquil. Because Rockwool Safe and Sound insulation effectively reduces noise transmission between rooms, it is a popular choice. We’ll take you step-by-step through the installation of Rockwool Safe and Sound insulation in this simple-to-read guide.
What is Sound and Safe Insulation Made of Rockwool?
One kind of mineral wool insulation made especially for soundproofing is called Rockwool Safe and Sound insulation. Slag that has been recycled and natural stone are melted and spun into fibers to make it.
After that, these fibers are squeezed into thick rolls or batts, which greatly increases their ability to absorb sound waves.
Advantages of Soundproof and Safe Rockwool Insulation:
Because rockwool insulation is mold- and moisture-resistant, it stops mold and mildew from growing inside the building envelope. Because rockwool insulation is mold- and moisture-resistant, it stops mold and mildew from growing inside the building envelope. This capacity to control moisture helps preserve the quality of the air indoors and safeguards the structural integrity of the building, extending its life and lowering maintenance needs, according to research the benefits of using Soundproof and Safe Rockwool insulation include its outstanding ability to block out noise, as well as its resistance to fire, moisture, mold, and heat. Let’s see the all benefits of this insulation material in the following post-
Superior Sound Absorption
Rockwool Safe and Sound insulation reduces noise transmission between rooms by efficiently absorbing sound waves.
Fire Resistance: Advantages of soundproof and safe rockwool insulation
Rockwool is known as a great option for fire-resistant insulation because it is non-combustible and has a high melting point.
Thermal Insulation: Advantages of Soundproof and Safe Rockwool Insulation
Rockwool Safe and Sound insulation not only reduces noise but also offers thermal insulation, which contributes to increased energy efficiency. This is the more beneficial benefit of the Rockwool sound insulation.
Environmentally Friendly:
Due to health care and environmental sustainability, most people use this insulation material. Rockwool insulation is a sustainable option for customers who care about the environment because it is composed of natural and recycled materials.
Required Tools and Materials:- Rockwool Sound Insulation Installation

To insulate your property by using this material you need to following tools. Get the necessary supplies and tools before starting the installation process:
Utility knife; Rockwool Safe and Sound insulating batts or rolls
Measurement tape
Goggles for safety
mittens
a respirator mask to guard against dust
The linear edge
(Optional) staple gun and staples
Foil tape (if necessary for seam sealing)
Installing Rockwool Safe and Sound – Steps for Installation
You should follow the following steps, to install rockwool sound insulation
Step 1: Set Up Your Desk- Installing Safe and Sound
Make sure the area is tidy and clear of any debris before adding the insulation. To protect oneself from dust, wear a respirator mask, gloves, and safety eyewear.
Step 2: Calculate the Insulation and Cut It
Take measurements of the area where the insulation will be installed, being sure to account for any obstructions like pipes or electrical outlets. Cut the insulation rolls or batts to the proper size with a straightedge and utility knife.
Step 3: Install the insulation- Installing Rockwool Safe and Sound

Make sure the cut insulation rolls or batts fit snugly into the wall or ceiling cavities by carefully placing them there. If required, fasten the insulation in place with a staple gun. To keep the insulation from compressing, make sure to allow a tiny space around electrical outlets and other fixtures.
Step 4: (Optional) Seam Sealing
Use foil tape to seal the gaps between the insulation pieces if you are installing insulation in a wall or ceiling cavity that has many parts. This will enhance soundproofing effectiveness and lessen air leakage.
Step 5: Evaluate the Outcome- Installing rockwool safe and sound
After installing the insulation, make noise in one room to see if the soundproofing is effective. Then, listen for any decrease in sound transmission to the other rooms. To attain the adequate degree of soundproofing, make the necessary adjustments to the insulation.
Step 6: Tidy Up- Rockwool Safe and Sound Installation
Clear the workstation and dispose of any residual insulation scraps. Once you have handled the insulation, properly wash your hands.
In summary Rockwool Sound Insulation Installation and Rockwool Safe and Sound Installtion
The ease of installation of Rockwool Safe and Sound insulation can greatly enhance your house or place of business’s ability to block out noise. You and others can have a more peaceful and comfortable space by doing as instructed in this article and adopting the necessary safety measures. Safe and Soundproof With so many benefits to offer, Rockwool insulation is a great option for both residential and commercial structures
According to research Its known as remarkable soundproofing qualities are one of its main advantages. Rockwool insulation can help to reduce sound transmission and help to make an interior space quieter, protecting residents from outside noise pollution as well as improving general comfort. Its fibrous and thick construction minimizes reverberation and promotes quiet living and working environments by absorbing sound waves.
Furthermore, we say that Rockwool insulation is well known for having exceptional fire resistance quality, which gives structures an extra degree of security. Because it is made of non-combustible materials, it functions as a barrier to stop the spread of fire, greatly lowering the possibility that the building will catch fire.
Do let us know how you feel about this information by commenting.
Like our Facebook page and follow for other updates like this.

